Sunday, October 23, 2011

The Perfect Fall Meal

The air is crisp, the leaves are changing color, and haunted forests are in full swing. It is fall! It is time for chili (if you don't have a crazy reaction to the peppers...not fun!), apple cider, pumpkin carving, and football Sundays. I love coming in from a fall run and having something warm and comforting at this time of year. For a warm, fall weekend meal, I went for a twist on an old Italian favorite, butternut risotto. And for dessert, delicious pumpkin cupcakes. 

I have been waiting for weeks to make this recipe, and it was a delicious, creamy success! And it is healthy (always a bonus)! You can find the recipe here at Good Housekeeping.


Ingredients:
1 tbsp margarine
2 shallots, thinly sliced
2 sprigs fresh thyme
2 cups pearl barley
4 cups vegetable broth
2 cups water
1 large butternut squash, cut into 1/2 inch cubes
Salt and pepper
1 ounce (2/3 cup) grated Parmesan cheese
2 tbsp chopped fresh parsley leaves

1.In a skillet, melt 1 tbsp margarine. Add shallots and cook for 2 minutes. Add thyme. Add barley and cook 2 minutes, until toasted.


 2. Transfer to a slow cooker bowl. Add broth, water, squash, and 1/2 tsp salt. Cover and cook on high 3 1/2 to 4 hours until liquid is absorbed.  


3. Uncover and discard thyme. Add Parmesan, 1 tsp salt, and 1/4 tsp black pepper. Stir until cheese melts. 
Enjoy!!
Now for dessert - Martha Stewart's Pumpkin Cupcakes!!


Ingredients:

  • 2 cups all-purpose flour
  • 1 teaspoon baking soda
  • 1 teaspoon baking powder
  • 1 teaspoon coarse salt
  • 1 teaspoon ground cinnamon
  • 1 teaspoon ground ginger
  • 1/4 teaspoon freshly grated nutmeg
  • 1/4 teaspoon ground allspice
  • 1 cup packed light-brown sugar
  • 1 cup granulated sugar
  • 1 cup (2 sticks) unsalted butter, melted and cooled
  • 4 large eggs, lightly beaten
  • 1 can (15 ounces) pumpkin puree
1. Preheat oven 350 degrees. Line cupcakes pans, set aside. In a medium bowl, whisk together flour, baking soda, baking powder, salt, cinnamon, ginger, nutmeg, and allspice; set aside. 


2. In a large bowl, whisk together, brown sugar, granulated sugar, butter, and eggs. Add dry ingredients, and whisk until smooth. Whisk in pumpkin puree. 


3. Divide batter evenly among liners, filling each about halfway. Bake until toothpick comes out clean, about 20-25 minutes. Let cool completely. 


4. Now it is time for the best part...frosting! I used a basic cream cheese frosting, with cream cheese, powdered sugar, vanilla, and butter. 


And the fall decorations! 
Fall fabulous cupcakes!!!
These cupcakes were amazing! I think the best I have ever made. The cupcakes were enjoyed by many as the treat for my friend's birthday game night on Saturday. A few leftover ones made a perfect sweet ending to a hearty fall butternut squash risotto meal. I love fall! 

Monday, September 26, 2011

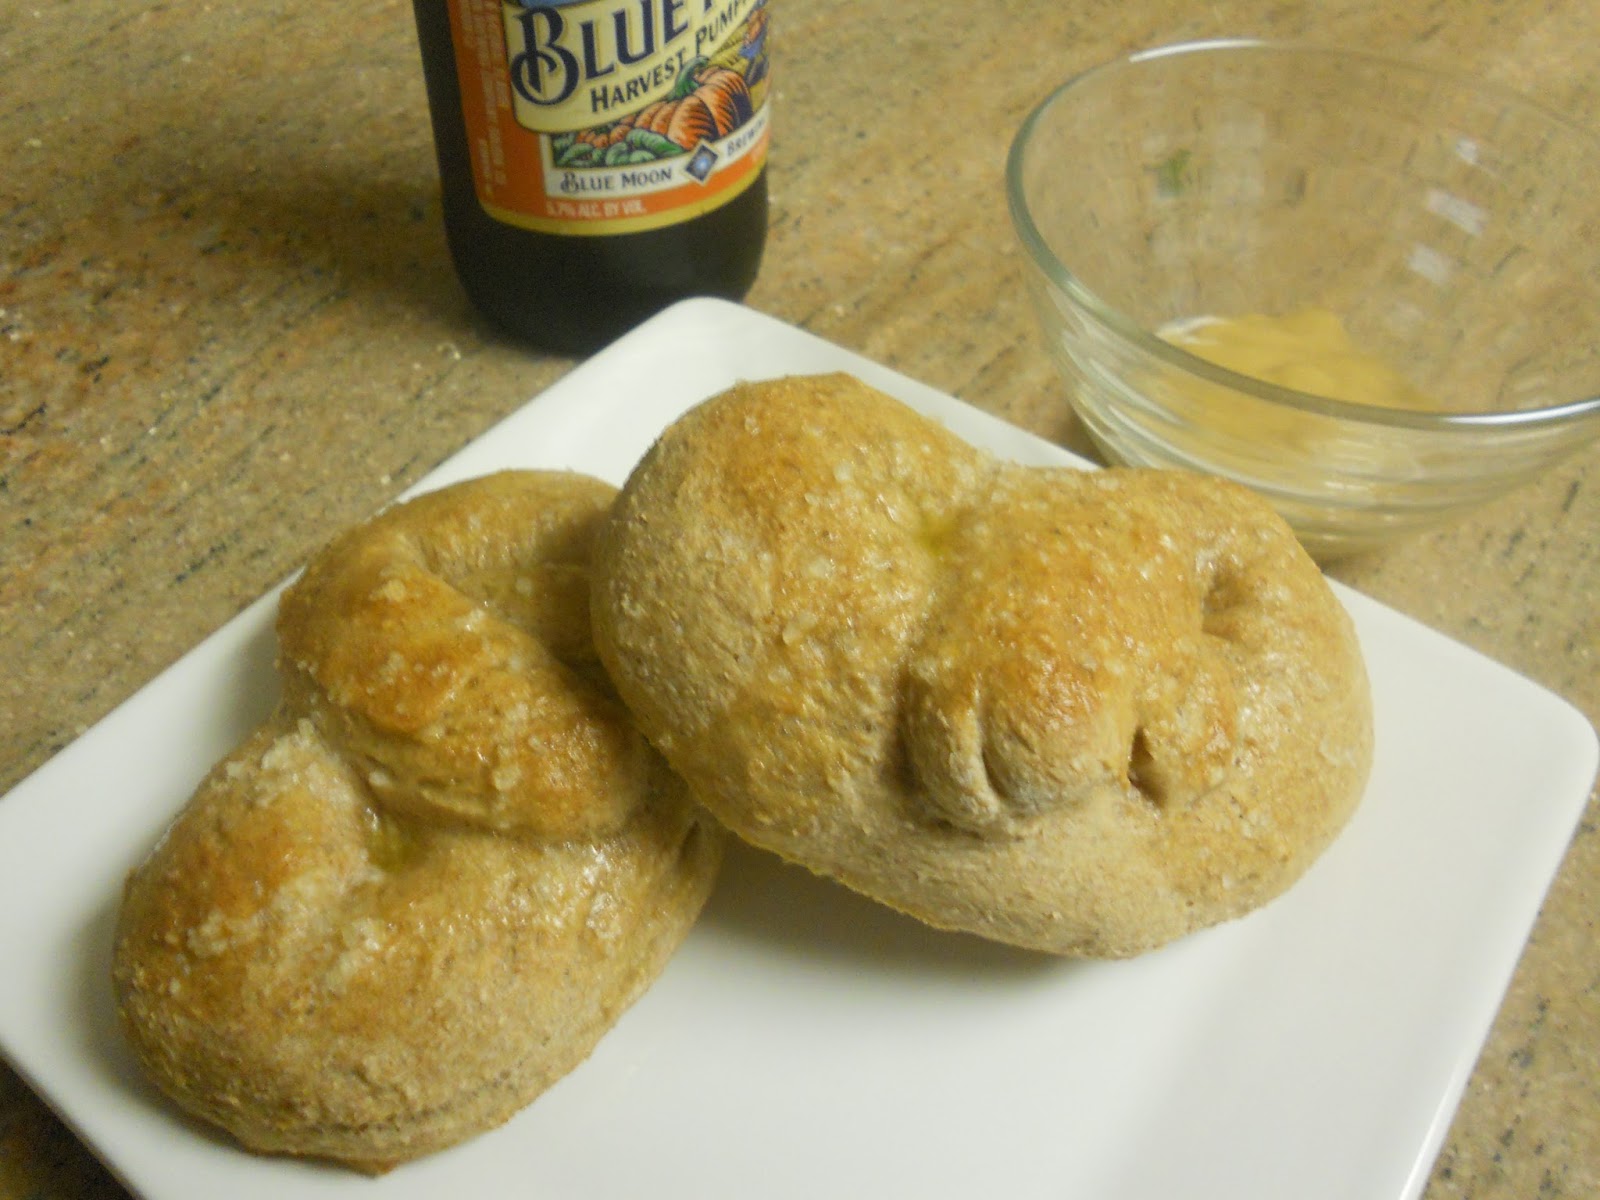
Pumpkin Beer Pretzels

I love fall because fall means that it is okay to make everything with pumpkin! 'Tis the season for pumpkin pancakes, pumpkin cookies, pumpkin bread, pumpkin beer, and pumpkin pretzels! Today was a day of fall decorating in my apartment, so I wanted to make something to start off my favorite season, with one of my favorite ingredients - PUMPKIN! I was feeling a bit lazy and didn't want to go to the store to buy canned pumpkin for pumpkin muffins (look for some in the future!), but thanks to my dad, I have an abundance of pumpkin beer on hand. Pretzels are on of my favorite treats because you can dip them in all kinds of mustard. I found a great recipe on one of the best cooking blogs I have found, wearenotmartha.com. 


Ingredients: 1 packet active dry yeast
1/2 C warm water, plus 2 C warm water
1/2 T sugar
1/2 t fine sea salt1 t olive oil
1 C pumpkin beer of your choice
3-4 C all-purpose flour (I used mostly whole wheat flour) 
1 t baking soda
1 egg, beaten
2-3 T coarse salt
1 T butter, melted


Directions:
1. In a large bowl, add dry yeast to 1/2 cup of warm water and let it sit for 5 minutes.
2. Add the sugar, salt, and olive oil. Pour in the beer. The yeast makes it very foamy!
**I also added some cinnamon and nutmeg to try and bring out the pumpkin flavor. 
3. With a wooden spoon, add in 1 cup of flour at a time. Start by adding 3 cups, and add more if needed.
4. Knead dough on floured surface or put in mixer with dough hook (much easier!) and mix for 3 minutes.  Add flour if necessary.
5. Cover dough with a towel for an hour to let it rise. 
6. Punch the dough down. Separate into 12 pieces to make individual pretzels. 
7. Roll out each dough piece into a rope. 
8. Form the rope into a pretzel shape. 
9. Mix the remaining 2 cups of warm water and baking soda in a small baking dish. Dip each pretzel in the water and then place on a well greased cookie sheet.

10. Cover with a towel and let rise for an additional 20 minutes. 
11. Brush each pretzel with a lightly beaten egg. Sprinkle with coarse salt. 
12. Bake for 10-15 minutes at 425. 
13. Brush with melted butter immediately and let cool.


And enjoy with a pumpkin beer and any type of dipping sauce you like. 


A perfect fall or game time snack! My pretzels came out with the perfect amount of slight crunch on the outside, soft inside. Although the pretzels didn't have a lot of pumpkin flavor, they were delicious dipped in some honey mustard! Next time, I think I will add pumpkin puree to the dough to really bring out the pumpkin flavor. It is just the beginning of my favorite season, and many more pumpkin cooking creations to come!


Thursday, September 22, 2011

Cake Pops!

I know I am jumping on the Cake Pop bandwagon, but I can't resist! They are fun, bite sized treats, that can be made with any kind of cake and decorated however you want. My next baking investment will be either a cake pop pan (buybakepops.com) or a Babycakes Cake Pop maker. I am trying to spread the word on my baking, and a bake sale at the school I work at was exactly what I was waiting for. I made nearly 4 dozen green and yellow (go Cougars!) cake pops for the event. Of course, the day before the bake sale was cancelled! But they will not go to waste. The teachers will get to enjoy them in the staff lounge as a delicious Friday treat. 


I used the chocolate velvet cake batter from Southern Living that I have used before. You can find the directions for the cake at the Southern Living link. You can use any cake you would like, including boxed if you don't like to make cake! Cool cake completely before starting your cake pop.


To make cake pops, you will need chocolate wafers in whatever color you desire, any other toppings/decorations, and lollipop sticks (you can find these at craft store).


Crumble cake into a large bowl. Mix with icing of your choice until all cake is coated
and it is the consistency of cookie dough.
Roll cake and icing mixture into balls. Refrigerate for a few hours, or overnight. 
The colors of the school I work for are yellow and green.
Melt chocolate in bowl for dipping your cake pops.
Dip the lollipop stick in the melted chocolate.
Push lollipop stick into cake pop, but don't push the whole way through.
Dip cake pop into chocolate and cover with other decorations. 
I wrapped each cake pop in a small plastic treat bag (also can be purchased at a craft store).
Not only did I make 4 dozen Cougar pride cake pops, but I was asked to make football cake pops for a co-worker. My first client!!! Using the same cake batter and method of combining crumbled cake and icing, I shaped the balls into footballs instead. 
Assemble the cake and lollipop stick, then dip! 
Refrigerate until chocolate gets hard.
Footballs! 
I can't wait to make these again for Steelers games this season. I am excited for everyone to try these cake pops out, and hopefully I will get some more business! I am currently taking orders :) 

Tuesday, September 13, 2011

PB and J...Cupcakes that is!

One of my favorite comfort foods is a really good PB and J sandwich. Or just peanut butter in general. It is not a good idea for me to have it around. I am known to spoon it out right from the jar. My family was in town last weekend and we were having a crab cake dinner with some of the ladies. I decided to do what I do best, dessert! I needed a little comfort to go along with my wine and crab cakes, so I found a great recipe for jelly filled cupcakes. I made my own PB frosting, mainly because I did not have cream cheese for the frosting in the recipe, and I wasn't going back to the store.

You can find the recipe here!

Ingredients for cupcakes: 1 1/2 cups AP flour
1 tsp baking powder
1/2 tsp salt
1/2 cup butter, room temp
1 cup sugar
2 large eggs, plus 1 egg yolk
2 tsp vanilla
3/4 cup milk
Jelly - use any that you like!

1. Sift flour, baking powder, and salt into a bowl.
2. Cream butter and sugar with mixer until fluffy

3. Beat in eggs and vanilla. Pour in milk and beat until smooth.
4. Gradually pour the dry ingredients in. Mix until blended.

5. Spoon batter into lined cupcake pan. Bake at 350 degrees for 20 minutes.
6. Cool completely before filling or icing.

Filling Your Cupcakes
Cut hole in top of cupcake with a knife.
I have a tool that does this for you (from Bed Bath and Beyond).
Be sure to save top that you cut off!

Fill with Jelly.

Replace top to cupcake over filling.

Frosting
1/2 cup butter
1 cup peanut butter
3 tbsp milk
2 cups confectioner sugar

Beat peanut butter and butter. Add sugar.
Add milk, 1 tbsp at a time until desired consistency.
Mix until fluffy.

Frost and decorate as you would like!
 The recipe recommends crushed peanut butter candy (snickers, butterfingers, etc).
I went simple with some chocolate sprinkles.
And enjoy with a glass of milk (or wine!)

These PB and J cupcakes were the perfect end to a delicious dinner! The cupcake is a little spongier and denser then others, but works well holding in the jelly filling. The original recipe gives an alternative filling option, so choose whichever is best for you! Filling cupcakes is easy, and a great way to change up a recipe, or make a new flavor combination.

Tuesday, September 6, 2011

You can call me the cookie monster

It is that time of year again...back to school! But before that happened, I needed to do some final summer baking. As many of you know, we have been hit with mother nature a lot this year, and the recent hurricane brought upon a lot of hours in the kitchen. My roommates and I decided to have hurricane party, and to celebrate I made some ferocious hurricane cookies. I think they were more dangerous than Hurricane Irene ended up being. Once you ate one, you just couldn't stop!

I made my favorite cookie batter, the one that tastes like the "Walmart crack cookies." You know, the big sugar cookies with thick, colorful icing? I doubled the following recipe  to make about 2 dozen or so cookies.

Cookie Ingredients: 

1 1/3 cup AP flour
1/2 cup sugar
1/2 tsp vanilla
1 egg
5 1/2 tbsp butter, softened
1/3 cup buttermilk  (I made my own by using milk + lemon juice, let sit for 5 minutes)
1/2 tsp baking soda
1/2 tsp salt

Directions:

1. In a large bowl, combine flour, baking soda, and salt. Set aside for now.

2. Cream together the butter and sugar until light and fluffy.

3. Add egg and beat for 3 more minutes. Alternate adding the buttermilk and
the flour to the mixture, starting and ending with the flour.
 Add the vanilla and beat until all is combined. 
4. Pipe out or scoop out (I found piping the batter out of a plastic bag easiest) onto a lined baking sheet. Bake for 10-12 minutes on 350.

The best part of these cookies - the icing! And not just the icing, but my hurricane icing.

Icing Ingredients and Directions:
(Doubled)
1/2 cup butter or margarine, softened
1 box (or 3 cups) of powdered sugar
1 tsp vanilla
2-3 tbsp milk
Red, green, and blue food coloring

1. Cream the butter and powdered sugar.
2. Add the vanilla.
3. Add 1 tbsp of milk at a time until it is the consistency you want.
4. Separate icing into 3 bowls, add red, green, and blue food coloring to a bowl.

Hurricane cookies! Layer the icing with red in the middle.
Swirl lightly to make the icing appear as if it is a hurricane on the weather radar!
I made the same cookies the next day, but football shaped for my Fantasy Football draft.
To make cut-outs with this batter, refrigerate for a few hours first.
A few days later, I used this same recipe x5 and made nearly 100 cookies for the staff at my school, to welcome them back to a new school year. I have to say, this is my go to cookie recipe. You really can't go wrong with them! They are soft, sweet, and delicious! And you can be as creative as you would like with the icing. So if this winter you are stuck in another Snowpocalypse this year, you know what kind of cookies to make for your Snowpocalypse party (or just to enjoy for yourself!)


Monday, August 22, 2011

Tex Mex Veggie Burgers

I have taken a few weeks off from cooking because of vacation, but I am back in DC and have a lot of new meal and dessert ideas for the fall! I am a huge fan of veggie burgers, and although I enjoy the convenience of the frozen, store bought kind (especially from Trader Joe's) I have been looking for something different that I could make at home. I stumbled upon a few recipes to chose from, and decided on a tex-mex style bean burger. The perfect combination of hot jalapeno peppers, filling beans and rice, and smooth avocados. It reminded me a lot of a bean burrito, just on hamburger buns!


Ingredients:
1 c. quick-cooking brown rice
2 ripe medium tomatoes, chopped
2 Tbsp. fresh cilantro, chopped
1 Tbsp. fresh lime juice
1 Tbsp. pickled jalapeno slices, finely chopped
Salt and pepper
1 can pinto beans, rinsed and drained
1 c. corn kernels
1 clove garlic, crushed with press or finely chopped
1/2 tsp group coriander
1/4 tsp chipotle chile powder
1 Tbsp. vegetable oil
Whole wheat hamburger buns
Avocado slices
Any other toppings - Spinach, jalapenos, etc.

Directions:

1. Cook rice as directed on box. Let cool.

2. Combine tomatoes, cilantro, lime juice, jalapeno, and 1/8 teaspoon salt in a bowl.
Set aside. This will be the salsa topping for your burger.
*I added extra jalapenos to give it an extra kick

3. In food processor, pulse rice, beans, corn, garlic, coriander, chile powder,
1/2 tsp salt, and 1/4 tsp pepper until combined.


The patty mixture can be covered and refrigerated for up to 4 hours.
I know - it does not look appetizing now, but it will be soon!

4. Shape mixture into 3-4 patties, depending on the number of servings.
(I made 3 large patties but you can definitely make 4 out of this amount)
In skillet, heat oil for about 1 minute. Cook burgers 8-10 minutes or until browned, turning once.

5. Serve on whole wheat buns with the jalapeno tomato salsa, and other toppings of your choice. 
We used spinach, avocado, and extra jalapenos. 
(Sorry for the out of focus picture, I was in a hurry to eat!)
Instead of a typical side salad to complete this meal, I decided to make one of my favorite summer salads. A delicious watermelon and feta salad.

Mix together watermelon, feta, basil, and balsamic vinegar for a refreshing summer salad.
You can also use mint leaves instead of the basil, and ricotta instead of feta.

A healthy, filling summer dinner that can be enjoyed by vegetarians and non-vegetarians alike!


Sunday, August 7, 2011

WHOOPIE!!

Who doesn't love the childhood favorite Whoopie Pies aka gobs? As a child, my favorite were the traditional chocolate cake pies with cream in the middle. Now, I love the red velvet and pumpkin versions. I was lucky enough to recieve a whoopie pie pan and mix for my birthday. These pans make the perfect whoopie pie cakes. I decided to make these as the dessert to a healthier, summer dish that I found in the Washington Post a few weeks back. Both together make a perfect summer evening meal!

 Shrimp and Pasta with Feta and Spinach Casserole

Ingredients:
1/4 tsp of salt
8 oz dried pasta
3 Tbsp EVOO
2 cups baby spinach
3 Tbsp grated Parmigiano Reggiano cheese
3 oz feta cheese
2 medium cloves garlic
1 pound large, peeled and deveined, shrimp
14 oz canned whole tomatoes
1/4 cup dry white wine
1 tsp dried oregano,
1/4 tsp crushed red pepper
Leaves from 6-8 stems parsley
1/4 tsp ground black pepper

Note: The original recipe calls for using orzo or stelline, but I had whole wheat rotini that I wanted to use


1. Bring large pot of water to a boil. Cook pasta according to directions. Drain and return to pot
2. Preheat the oven to 400 degrees. Use a tsp of oil and brush the inside of a medium bakin dish.


3. Coarsely chop the spinach and crumble the feta.
4. Stir in 1 Tbsp of the oil into the pot with the pasta, then add the spinach, Parmigiano-Reggiano, and half of the feta. Transfer the mixture to the prepared baking dish.
5. Chop the garlic.

6. Heat 1 Tbsp oil into skillet over medium-high heat. Add the shrimp and cook until slightly pink. Mix shrimp into the pasta dish.
7. Coarsely chop the tomatoes, saving their juices.

8. Heat the remaining oil in a skillet over medium heat. Ad the garlic and cook until fragrant. Stir in the tomatoes and their juices, wine, oregano, and crushed red peppers. Cook for about 5 minutes, stirring occasionally.
9. Chop the parsely, and stir into the tomatoe sauce. Remove from heat. Season with salt and pepper.


10. Spoon the sacue over the shrimp and pasta.
11. Transfer to the oven and bake for about 10 minutes. Sprinkle with remaining feta.

This dish is delicious! And it is good hot or cold. I am thinking of putting a little over a bowl of spinach salad for a nice lunch tomorrow.

Whoopie Pie

Originially, I was going to make my first round of whoopie pies from a box mix that I was given with the pan on my birthday. I left them in the oven a minute to long and they burned. I ended up making the cakes from scratch, and used the filling mix that was in the box. Next time I will do both from scratch, but the boxed filling sure is good!

Whoopie Pie Cake Ingredients (makes 12 cake halves, or 6 whoopie pies)
1/2 stick of butter, softened
1/2 cup firmly packed brown sugar
1 egg
1/2 tsp vanilla extract
1 cup all-purpose flour
1/4 cup cocoa powder
1/2 tsp baking powder
1/2 tsp baking soda
1/4 tsp salt
1/2 cup buttermilk

For filling:
I used the box mix, plus 6 Tbsp butter, and 1/2 Tbsp milk.

Note: I did not have buttermilk, so I made my own! For 1/2 cup of buttermilk, I filled a half cup with 1/2 Tbsp of lemon juice and then filled the remainder with milk. Let it sit for 5 minutes to sour and you have the equivalent of butter milk!

1. Preheat oven to 350 degrees. Spray Whoopie Pie pan with cooking spray.
2. Beat butter and sugar with mixer until light and fluffy. Add egg and vanilla, beat until combined.
3. In another bowl, sift togther flour, cocoa powder, baking powder, baking soda, and salt.

4. Add half the dry ingredients into the butter mixture and mix. When most of the dry ingredients are incorporated, add the buttermilk.
5. When mixed, stop the mixer and add the remaining dry ingredients. Mix on low just until combined.

6. Spoon approximately 2 Tbsp of batter into each whoopi pie maker. Each should be about 2/3 of the way full.
7. Bake for 8-10 minutes. Allow to cool completely.

The filling I used came from a box mix, but a standard Whoopie Pie filling
contains confectioner's sugar, butter, and marshmallow fluff.

Once filling is mixed, spread on one cake and sandwich with another cake.

You can get almost as creative as cupcakes with Whoopie pies! I made some with yellow filling (which I will use again during football season!) I also used fruit jam on a few others.
Other ideas include flavoring the filling, making different flavored whoopie pies, using sprinkles and other decorative candies, and using food coloring to make the filling various colors. The whoopie pies aren't huge like ones you might get at the bakery, so they are nice little treat!

I have to say, these whoopie pies were amazing!! I am excited to make some more black and yellow ones come football season, as well as experimenting with different flavored cake batter.